Monday, December 29, 2014

French baguettes

This year one of my Christmas gifts was a baguette pan from my daughter Nikole.  Today I made a couple of loaves with the directions and recipe that came with the pan.  It was a little time consuming as the dough raises twice, rests once and then raises again after shaping.  It was a pretty easy recipe, kneaded in the stand mixer with the dough hook. The pan has small, closely spaced holes and a pan of water is placed in the oven to create steam during cooking. 

Williams Sonoma's Crusty French Bread


2 cups warm water (100°)
1 tsp sugar
3 1/4 tsp dry yeast (I used quick rise)
5-5 1/2 cups all purpose flour
2 1/2 tsp salt
1 egg white slightly beaten with a pinch of salt

Combine the warm water and sugar in a small bowl and stir until sugar is dissolved.  Add the yeast and stir gently to mix then wait 5 minutes for it to get foamy.  Place 4 cups of flour and the salt in the bowl of a stand mixer and run the mixer on low to combine.  Slowly add the yeast mixture and combine on low for one minute.  Raise the mixer to low-medium and mix with the dough hook for 10 minutes adding the remaining flour 1/4 cup at a time.  (I used an additional one cup for 5 cups total.).  The dough should be elastic and pull away from the side of the bowl. 

Remove the dough from the mixer, knead for one minute and form into a ball.  The directions say to knead on a lightly floured surface but I did not flour my counter top and  my dough did not stick  Place the dough into a bowl in which a dusting of flour has been added.  Cover bowl with plastic wrap.  I covered the plastic wrap with a kitchen towel and placed it in a warm spot in the kitchen to raise until double (45-60 minutes)  When done with the first raise the dough is removed from the bowl, punched down and kneaded a couple of times, reshaped into a single ball and placed back in the bowl for the second raise.  The bowl is again covered with plastic wrap and a kitchen towel.  Allow to raise until double, about 20-30 minutes.

When the second raising is complete, turn the dough out and punch down again.  Divide the dough into two equal portions and form into two balls.  Allow to rest for five minutes.  I covered my dough with a kitchen towel.  Line the baguette pan with a kitchen towel that has been dusted with a small amount of flour.  Shape each dough ball into a long loaf with tapered ends.  The loaf should be about as long as the pan.  Repeat with the second dough ball.  Fold the extra toweling back over the dough and let it raise 20 minutes in a warm place. 

Once raised, remove the towel with the formed baguettes from the pan.  The directions said to spray the pan with cooking spray.  I brushed on a thin layer of  my homemade pan coat.  Then use the towel to roll the dough back into the pan.  Use a knife to make 3-5 shallow (1/4 inch deep) slashes on the tops of the loaves at a diagonal.  brush the surface of the loaves with the egg white/salt mixture. 

Place the pan in a oven that has been preheated to 425°.  The rack should be at the bottom 1/3 of the oven and a pan of boiling water should be placed on the oven floor or the lowest rack.  I used a cookie sheet on the bottom rack and the bread one level higher.  I placed the empty cookie sheet  in the oven, added the hot water and then place the baguettes in the oven.  The recipe calls for them to bake for 30-35 minutes or until they sound hollow when tapped.  I baked mine for 30 minutes. 

foamy water, sugar and yeast

dough ball ready for first raise

covered with plastic wrap and my new kitchen towels from Caitlin

shaped baguette on towel on pan

towel edges folded over

ready for the oven

all finished

the inside of the loaf
       
I thought the bread turned out great.  The outside was chewy, the inside was softer with great flavor.

baguette pan
What a great gift.  Thanks Nikole!

Monday, December 15, 2014

denny's and jan's donuts

This was originally my Grandma Alma's recipe but my parents have made it their own.  Several times a year they do 5, 6 or even 8 batches of these donuts.  Dad has a restaurant fryer with a donut dispenser mounted on it and the batter goes into the dispenser and then the donuts drop out of the dispenser into the hot fat.  Dad is the fryer and mom mixes up the batter.  No matter how many batches they do each one is mixed up individually as they are ready for it.  Grandma's recipe is one that she perfected years ago and mom never wavers from it.  All of the ingredients are added in the order listed and mixed with a mixer until the final 2 cups of flour which are stirred in by hand.  The fat is always lard.  The cream is always whipping cream but not heavy cream.  Mom has a stand mixer but she always uses her small electric hand mixer with the two beaters.   

Denny's and Jan's Donuts


4 eggs
1 3/4 cup sugar
1 tsp nutmeg
scant 1/2 cup whipping cream
1 cup buttermilk
3/4 cup buttermilk with 1 tsp soda
2 cups flour
1/2 cup flour with 2 tsp baking powder and 1 tsp salt
2 cups flour

In a large mixing bowl start by beating the eggs until they are slightly beaten.  Add the sugar and then the nutmeg.  When those are combined add the scant 1/2 cup whipping cream.  Add the 1 cup buttermilk and mix.  Combine the 3/4 cup buttermilk with the 1 tsp soda and then add to the mixing bowl and mix.  Using the mixer add the first 2 cups of flour.  Mix the baking powder and the salt with the 1/2 cup flour and add to the mix, mixing well.  Remove the mixer and mix in the final 2 cups of flour with a spoon.  My mom uses a large slotted spoon.  Use the dispenser to drop the donuts into the lard which has heated to 375-400° .  Turn the donuts to cook both sides and then drain on paper towels.  We dip the warm donuts in sugar. After they cool mom and dad bag them up in zipper bags and freeze them. 

Mom does not double the recipe or mix it up ahead of time.  She waits to make each succeeding batch until dad is just about ready for it.  I don't know if it is the leavening working for too long or some other issue but the donuts are just not as successful when mixed up differently.  She also is usually on a hunt for whipping cream when she knows they will be making donuts.  For some reason the heavy cream has resulted in less successful donuts when used. Our local grocery stores do not always offer plain whipping cream.  It is worth it though, even if she has to go out of town to get it because the donuts are that good. 

stan's and caroline's lefse

When our family started making lefse this was the first recipe that we used.  It was shared with my mom and dad by friends of theirs.  It was an easy recipe as it used instant potatoes so there was no peeling and cooking of the potatoes.  It made a dough that was easy to work with and had good flavor. 

stan's and caroline's lefse


1 pound package of Hungry Jack instant potatoes (8 cups)
6 1/2 cups boiling water
1 stick blue bonnet margarine
1 stick butter
1/2 cup cream
1 Tbsp sugar
1 Tbsp salt

Mix together and then chill overnight. 

4-6 cups flour

The next day, when cold knead in the flour.  Make into balls using approximately 1/4 cup of the dough for each ball and return balls to the refrigerator.  Remove the balls from the refrigerator a couple at a time so that the remainder stay cold.  Roll the ball into a thin round and then cook on a lefse grill.  When cooked fold in quarters and stack in a dish towel to keep them from drying out.  After they have cooled we place ours in a zipper top bag.   

Lisa's favorite kringla


Our Grandma Alma made kringla every year at Christmastime.  It is part of our Norwegian heritage.  We have been unable to locate the recipe used by her and so we have searched out and tried several different variations.  This recipe is one that my sister, Lisa, discovered and uses. 


Lisa's favorite kringla


1 cup sugar
2 tbsp butter
1/2 cup buttermilk
16 ounces cultured sour cream
1 tsp baking soda
1 tsp salt
1 tsp baking powder
3-4 cups flour

Combine sugar and butter.  Mix in the buttermilk.  Mix the baking soda in the sour cream and then add to the sugar/buttermilk mixture.  Combine the salt and the baking powder with part of the flour and stir into the mixture.  Add the remaining flour.  The dough will be sticky.  Refrigerate at least one hour.  Roll one ounce portions of dough into an 8 inch rope.  A dough scoop works great for portioning the dough into equal size kringlas.  Form the rope into a figure eight.  Bake 350 for 16 minutes (Lisa's original recipe called for baking at 350-400 for 12 minutes) they should be just turning very light brown on the bottoms when done.

Store in a covered container with waxed paper between layers. Lisa places a dish towel over the top layer as well.  This recipe can be doubled. 

Thursday, December 11, 2014

grandma alma's peppernuts


I don't remember Grandma making these every year but they I do recall her making them.  Lisa says that this is Grandma's recipe, I think she said it was the first recipe that Grandma gave her.  It makes quite a large batch and is quite labor intensive.  Maybe that is why I don't remember it being there every year.  These are tiny molasses cookies with all the spices that predominate in the fall/harvest/Thanksgiving/Christmas sweets: ginger, allspice, cinnamon, cloves and nutmeg. 


Grandma Alma's Peppernuts


2 cup sugar
1 cup shortening
3/4 cup molasses
1/4 cup dark karo syrup
1 egg
1/2 cup coffee
1 Tbsp vinegar
2 tsp baking soda
1/2 tsp salt
2 tsp ginger
1 tsp allspice
1 tsp cloves
1 tsp nutmeg
1 tsp cinnamon
6 cups flour

Mix together, chill at least 8 hours or overnight. Shape by rolling into a rope the size of a pencil and then cutting crosswise into small coins. Works well to cut directly onto the cookie sheet.  Bake 350 for 10-12 minutes. 

Tuesday, June 17, 2014

soft gingerbread cookie bars

This was a recipe that I found online.  It makes a bar cookie with the same flavor as a soft gingersnap.  It is frosted with a yummy cream cheese frosting.  I made mine in the food processor, but it would work equally well to mix it in the stand mixer or the portable mixer or it could be mixed by hand like our grandmothers did.

sugar, brown sugar and butter in the food processor

add an egg

molasses and vanilla

I used the homemade vanilla from my sister
ready for the dry ingredients

I use whole nutmeg freshly shaved with a microplane

The rest of the spices join the nutmeg on the sheet of parchment

flour and spices in the food processor

The finished dough divided to make two smaller pans

parchment folded to fit the pan and brushed with pan coat

The soft dough is pressed into the pans

when baked and cooled the frosting is applied with an off set spatula

use the parchment to lift the bars out and then peel off the parchment


Yep.  They're good.

Dusted with a little more nutmeg, this pan went into town for Dad's Day.

soft gingerbread cookie bars

1/2 cup butter
1/2 cup granulated sugar
1/2 cup brown sugar
1 egg
3/4 tsp vanilla
1/4 cup molasses
1/2 tsp cinnamon
1/8 tsp cloves
1/8 tsp nutmeg
1/2 tsp ginger
1/2 tsp salt
2 cups all purpose flour 
1 tsp baking soda

cream cheese frosting 

4 ounces cream cheese, softened
1/4 cup butter, softened
1 cup confectioners sugar
1/2 tsp vanilla

Preheat oven to 325°.  Prepare two 8 inch square pans or one small jelly roll pan (9x12x1) by lining them with parchment paper that ha been greased or sprayed.  I left parchment sticking up on two sides to use for handles to lift out the baked bars.

Cream together the butter and sugars.  Add add and mix.  Add vanilla and molasses and mix well.  Combine spices and dry ingredients and combine until thoroughly incorporated.  Divide the dough into two parts and press one part into each of the pans if using two pans or press all of the dough into the single pan if using one.  Bake 20-22 minutes or until edges just start to brown.  Cool completely.  While bars are cooling combine the frosting ingredients and whip until smooth.  Spread frosting over bars and cut into squares.

recipe adapted slightly from here

Tuesday, March 25, 2014

homemade one hour white bread

I recently found a bread recipe that I was anxious to try.  It is a fairly quickly made bread with few steps and few ingredients.  It turned out great.  It is a white bread, baked as a round loaf on a baking sheet instead of in a pan.  I have tried it a couple of times now and the bread was consistently good each time.  I did decide to make three slightly smaller loaves instead of two.  The bread has a great crust, is slightly chewy with a soft texture.  It makes great toast, either in the toaster or toasted on a sheet in the oven and it freezes well.

The process couldn't be easier.  I used my stand mixer with the dough hook to mix and knead the dough.  I used quick rise yeast that is added to the dry ingredients and then the warm liquid is added so no proofing is necessary.  Once mixed and kneaded the bread is shaped into loaves and allowed to raise for 25 minutes.  There is no second raising.  The loaves are slashed across the top and baked for 25 minutes.  The whole process takes about an hour.


Homemade one hour white bread


5 1/4 cup bread flour
4 tbsp sugar
1 1/2 tsp salt
1 1/2 tbsp quick rise (instant) yeast
1 1/2 tbsp oil
2 cups warm water (100-115°)

Place the flour, sugar, salt, and yeast  in the bowl of the mixer.  Combine the water and oil and add to the dry ingredients.  Using the dough hook mix for five minutes.  Remove the dough and knead it a few turns to make a smooth ball.  Divide the dough into two or more pieces and shape each into a round or oblong loaf.  Place on a greased or parchment lined baking sheet and cover with a dish towel.  Let raise 25 minutes.  Preheat oven to 350°.  Bake breads for 25 minutes.  When making three loaves I put two on one sheet and the remaining one on a separate sheet and I bake one sheet first and then the second.  There was no noticeable difference between the bread that baked first and the bread that had an additional 25 minutes to raise while waiting for the first sheet to finish baking.

Source: adapted from here

Shared here:

Tuesday, February 18, 2014

lemon poppy seed scone challenge

Today in an email conversation with Caitlin she asked if I had ever made lemon poppy seed scones as she had just had one and it was pretty good.  I have made scones but never lemon poppy seed ones.  I like scones and I am always on the lookout for a new scone recipe.  I did a quick Google search and found several recipes and they were all fairly similar--flour, sugar, butter, lemon zest, baking powder, soda and salt.  Some had an egg, some had lemon juice, they all had a dairy product for moisture but one was sour cream and one was yogurt and one was milk and two were heavy cream.  Some baked in a hotter oven for a shorter period of time, others a little longer at 25 degrees less temperature.  It was kind of hard to select one to try so I decided to try all five recipes.  What was interesting is that in one of the recipes the baker mentioned that she freezes her raw, shaped scones on a cookie sheet and once frozen she transfers them to a freezer bag and pulls them out as needed and bakes them fresh. I love that idea. 

So hear is my plan.  The next day or so I will hit up the grocery store for lemons and poppy seeds and I will make five batches of lemon poppy seed scones.  And I will bake one or two from each batch and freeze the remainder.  When Caitlin is back at the farm we will bake up some from the freezer of each kind and have a contest to see which most resembles her one that she sampled today and which one we like best.  I will share the recipe for the winner and the links to the rest.  And if none of these turn out to be "it" there is always a search on Pinterest...

Friday, January 17, 2014

breadsticks...or help! my bread didn't raise

Some in my family are Olive Garden fans.  Caitlin and I in particular like their Zuppa Toscana.  Their nearest restaurant is 90 minutes away so we don't often get there but when we do we usually have the soup, salad and breadsticks.

Olive Gardens has published some of their recipes on the web and we make Zuppa at home now.  I have been eating more soup lately and have been thinking a breadstick would be the perfect accompaniment.  Olive Garden makes a great breadstick.  A check of their website did not have a breadstick recipe but there are lots of copycat recipes out there.

I decided to try the Todd Wilbur recipe.  Todd Wilbur has written cookbooks and been on television with his copycat versions of restaurant favorites.  I am kind of a novice bread baker but recent attempts at whole wheat bread and pumpkin dinner rolls were successful so I was game to give it a try.

I have tried this recipe twice now.  With my first attempt I had already added the yeast to the water when I realized that I did not have enough bread flour.  All of the other recipes used all purpose flour but Todd felt that the bread flour was essential for this recipe.  I decided to go ahead, using the small amt of bread flour that I had and supplementing with all purpose.  The bread  dough was kind of stiff and didn't raise very well but I shaped it and baked it and vowed to try again after picking up some bread flour at the grocery store.  The breadsticks, once baked tasted okay, they were kind of dense but they had good flavor.

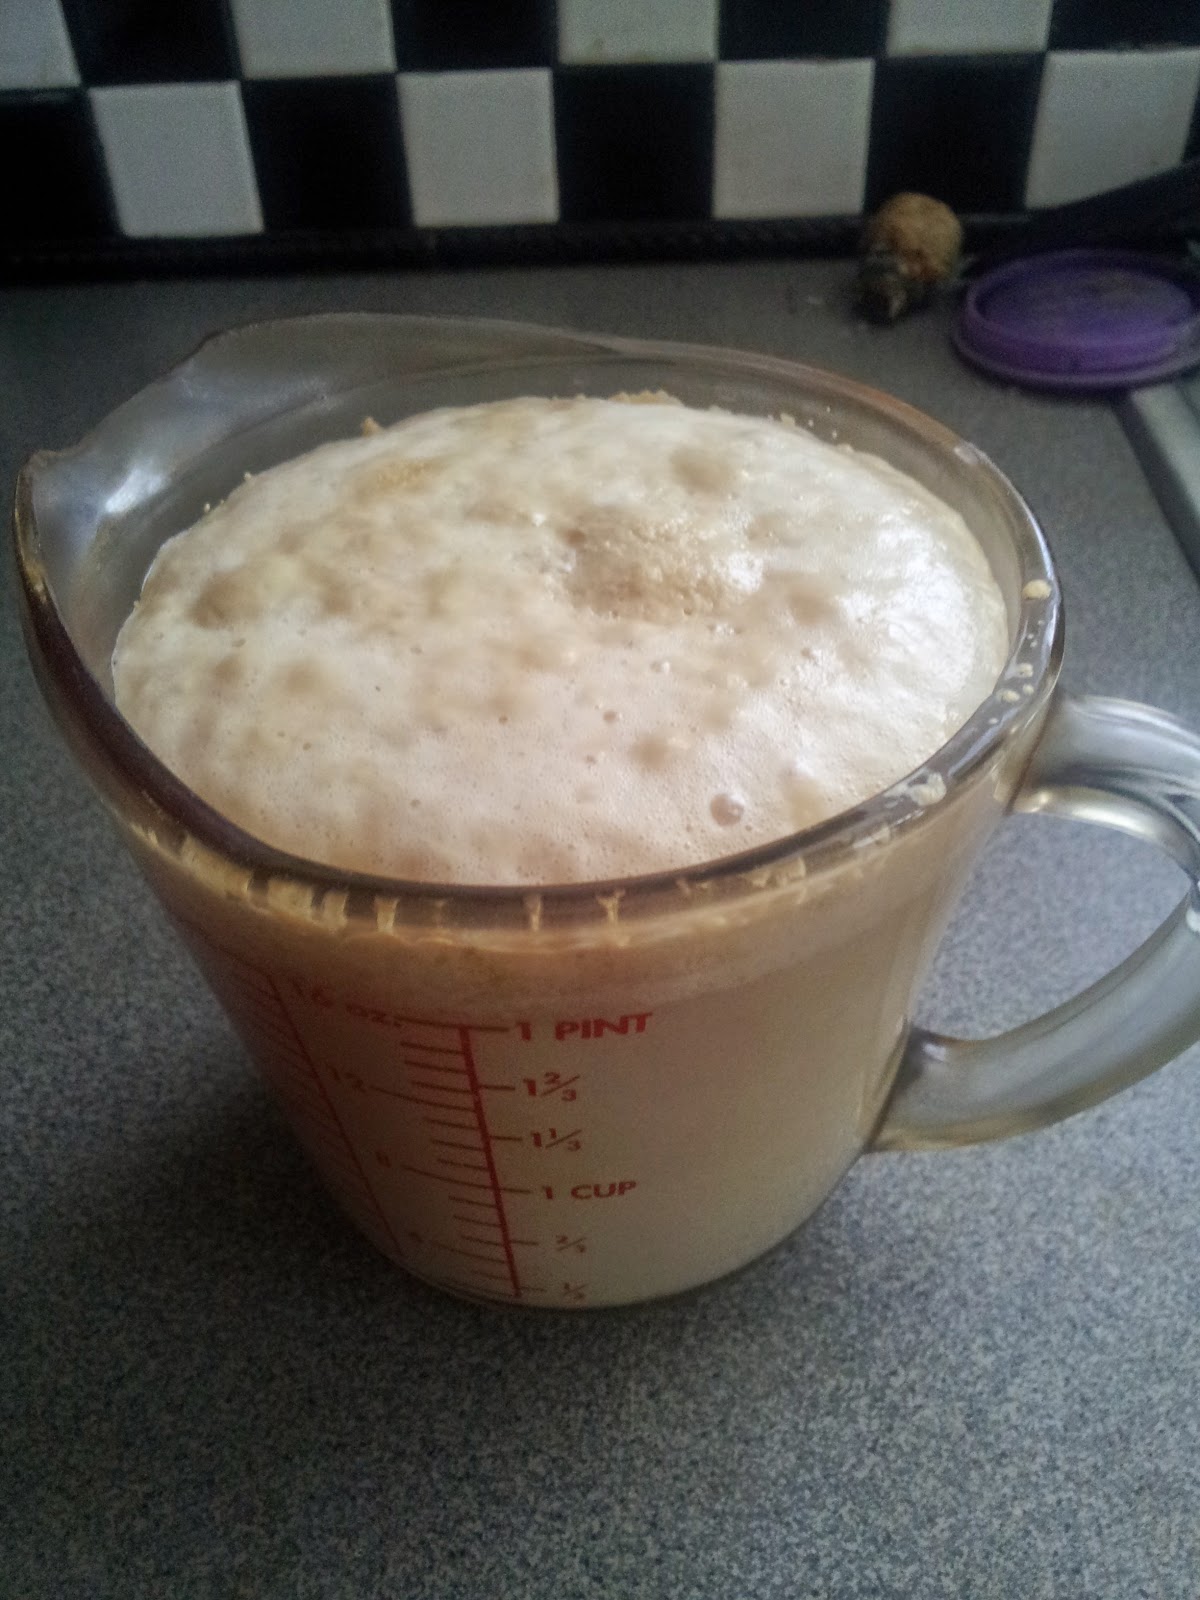
So attempt number two at  the Todd Wilbur copycat breadsticks was yesterday.  I followed the recipe using the requisite bread flour and set my dough to raise.  Nothing happened.  It did not raise.  90 minutes later I had the same lump of dough sitting in the bowl.

Google is my friend so I googled 'my bread didn't raise' and there were tons of hits.  Apparently I am not alone in the bread not raising department.  I picked several of the top sites and read thru the comments from people trying to help others with their bread issues and I learned a lot.

By far the most common suggestion was that it could have been dud yeast.  I checked for expiration date on my jar of yeast and mine was good.  And besides it worked not too long ago and I keep it in the refrigerator.

Another frequent comment was about the temperature of the liquid and the need to proof the yeast.  I have to admit that guessed on the temperature but I did proof the yeast and mine did get foamy.

There were some suggestions about how to rescue my dough so that I could still use it.  The method I chose was to make another batch of dough and cut up the 'bad' dough and incorporate it into the 'new' dough.  But first I did a bunch more reading.  Here are some things that I read.

  • One commenter suggested that too much flour would make the dough stiff and it wouldn't raise as well.  hmm...my dough was stiff.
  • One commenter suggested too much water when proofing the yeast could affect the raising.  hmm...my recipe called for more water than was suggested.
  • One commenter suggested that she was a professional baker who still sometimes had trouble with raising dough and more often it was the recipes that used water instead of milk that failed to raise for her.   Did I want to try milk?
  • There was an ongoing discussion about percent hydration and complicated formulas for how much liquid to flour ratios that was a little over my head but was interesting to read.
  • One commenter suggested that maybe the house was too cool to encourage bread raising.  Probably not my only problem but I was trying to bake bread in an old farmhouse during a blizzard.
  • One commenter recommended that she mixed her ingredients to wet her flour and then let is sit covered for a bit before she needed it to let the gluten start to form.  I could try that.
  • And then the conversation in the comments turned to substituting one yeast for another.  I took another look at my yeast (rapid rise) and the recipe (active dry).  Hmmm.  I thought rapid rise yeast was just a faster form of active dry but it turns out that it is used in different ways.  You add it with the dry ingredients instead of proofing it and adding it with the liquid.
  • There was also some discussion about the fat used but that discussion was from people from New Zealand(?) and they have different names for their fats apparently.  I decided not to worry about the half a stick of butter in my recipe just yet.
So here is what  I decided to do.  I would make another batch and when incorporating the last ingredients I would add the cut up chunks of 'bad' dough.  I would add the yeast with the dry ingredients and withhold part of the flour (I thought I would start with 1/2 cup less) and add it in if it seemed that the dough was just too sticky to work with.  I would check the temperature of the water.  I would let the dough rest for 20 minutes once the 'bad' chunks were incorporated and then knead.  And I would try to warm up the kitchen during the raising.

And it worked.  The breadsticks came out better than the first batch.  The dough raised both the first raising and the second raising once they were shaped.  The finished product was lighter and had a good flavor.  Were they perfect?  No.  Will I at anytime soon be competition for Olive Garden?  Not hardly.  I have a double batch of breadsticks that will last me a  while.  But I will try them again.  My shaping needs some work.  My breadsticks  are short and fat and more resemble a hotdog bun than a breadstick.  So I have some things to work on.  But I have a few in a cute storage jar in the pantry and a bunch more in the freezer.   I might by active dry yeast and give Todd's recipe another try but for how I will use up my rapid rise in this adapted recipe.


Copycat Olive Garden Breadsticks

2 Tbsp sugar
3/4 tsp rapid rise yeast
2 1/2-3 cups bread flour
1 1/2 tsp salt
1/4 cup (1/2 stick) softened butter
1 cup plus 1 Tbsp warm water

2 Tbsp melted butter 
1/2 tsp garlic salt

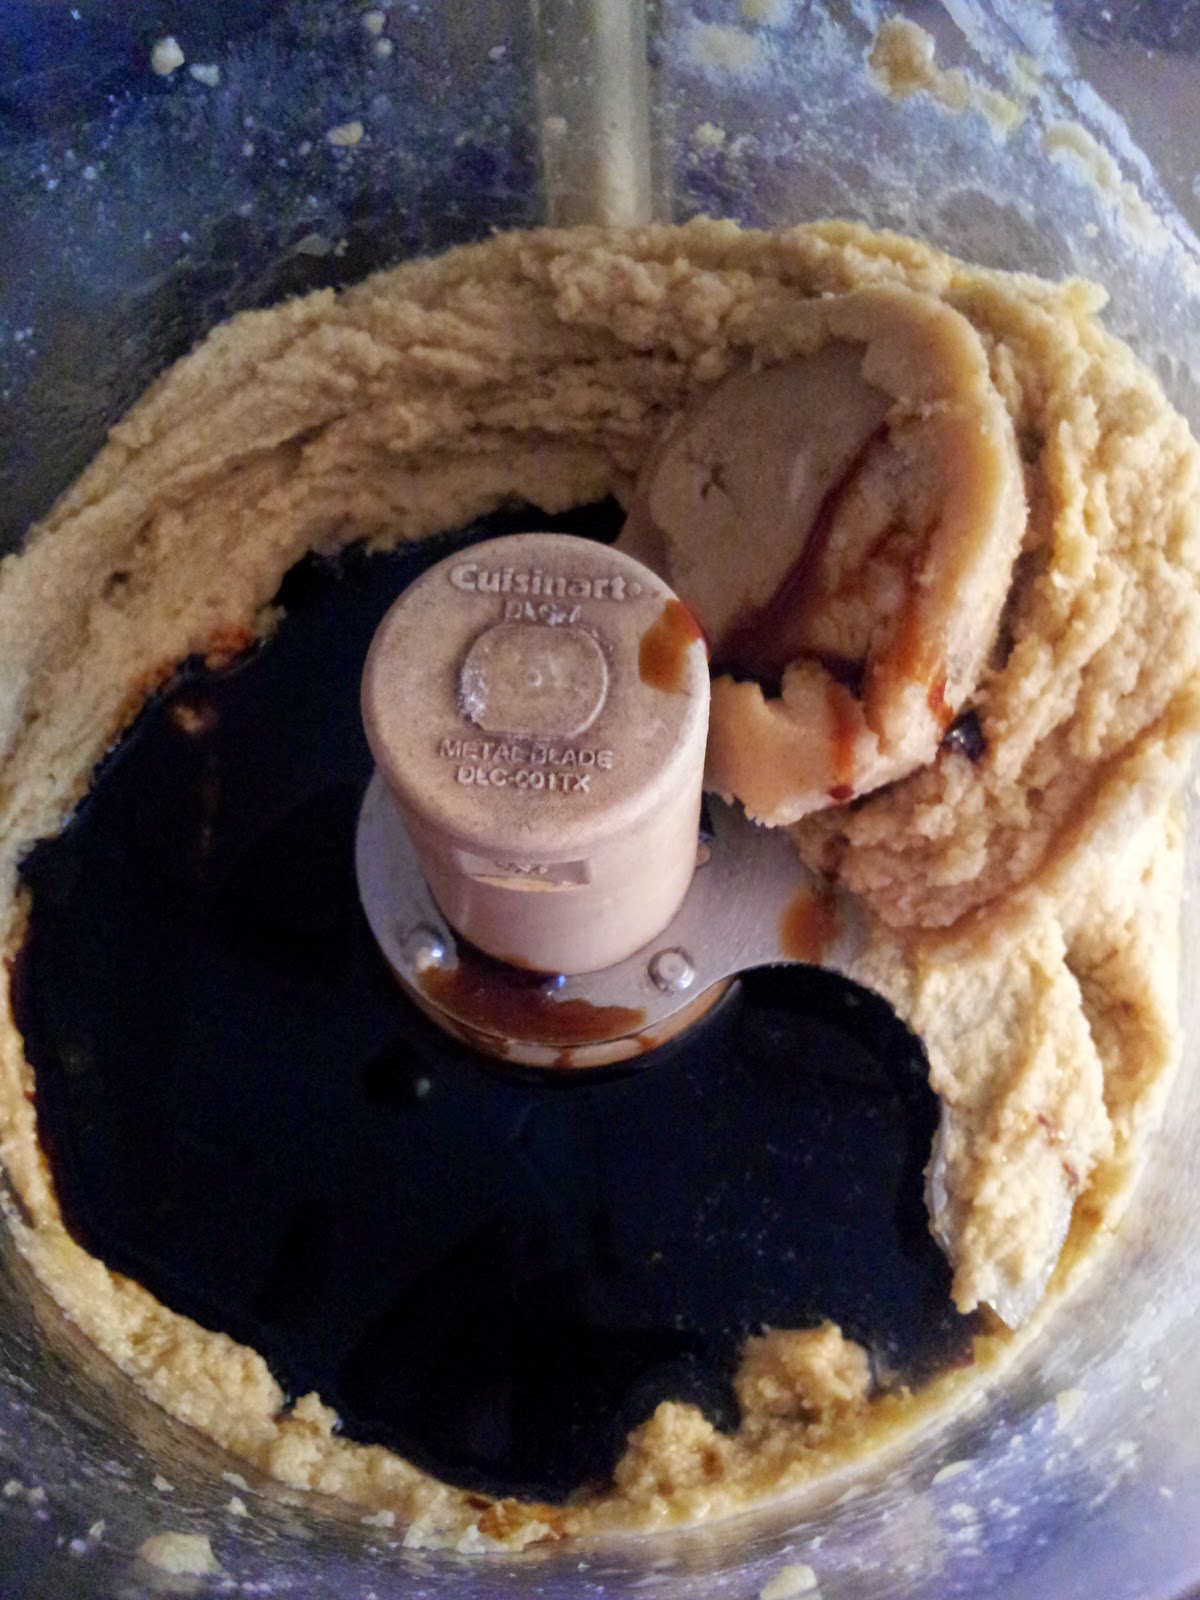
Combine the flour and the butter in a stand mixer with the paddle attachment and mix to incorporate the butter.  Add the yeast, sugar, and salt  and mix briefly to combine.  Add the warm  water and mix  until all of the dry ingredients are moist.  Remove the paddle attachment, cover the bowl and let it rest 20 minutes.  Attach  dough hook and knead for 10 minutes.  Let raise covered 60-90 minutes or until double in size.  Shape the dough by portioning into 12 or 13 two ounce pieces and roll between your hands or on the countertop to make a 7 inch long breadstick.  Place on a  parchment lined baking sheet and  cover and let raise another 60-90 minutes.  Bake 400° for 12 minutes.  When you take them out of the oven brush immediately with melted butter and sprinkle with garlic salt.


Recipes:

Todd Wilbur's recipe
Google search sites here, here, here, here and here.

Linking up with