Tuesday, June 17, 2014

soft gingerbread cookie bars

This was a recipe that I found online.  It makes a bar cookie with the same flavor as a soft gingersnap.  It is frosted with a yummy cream cheese frosting.  I made mine in the food processor, but it would work equally well to mix it in the stand mixer or the portable mixer or it could be mixed by hand like our grandmothers did.

sugar, brown sugar and butter in the food processor

add an egg

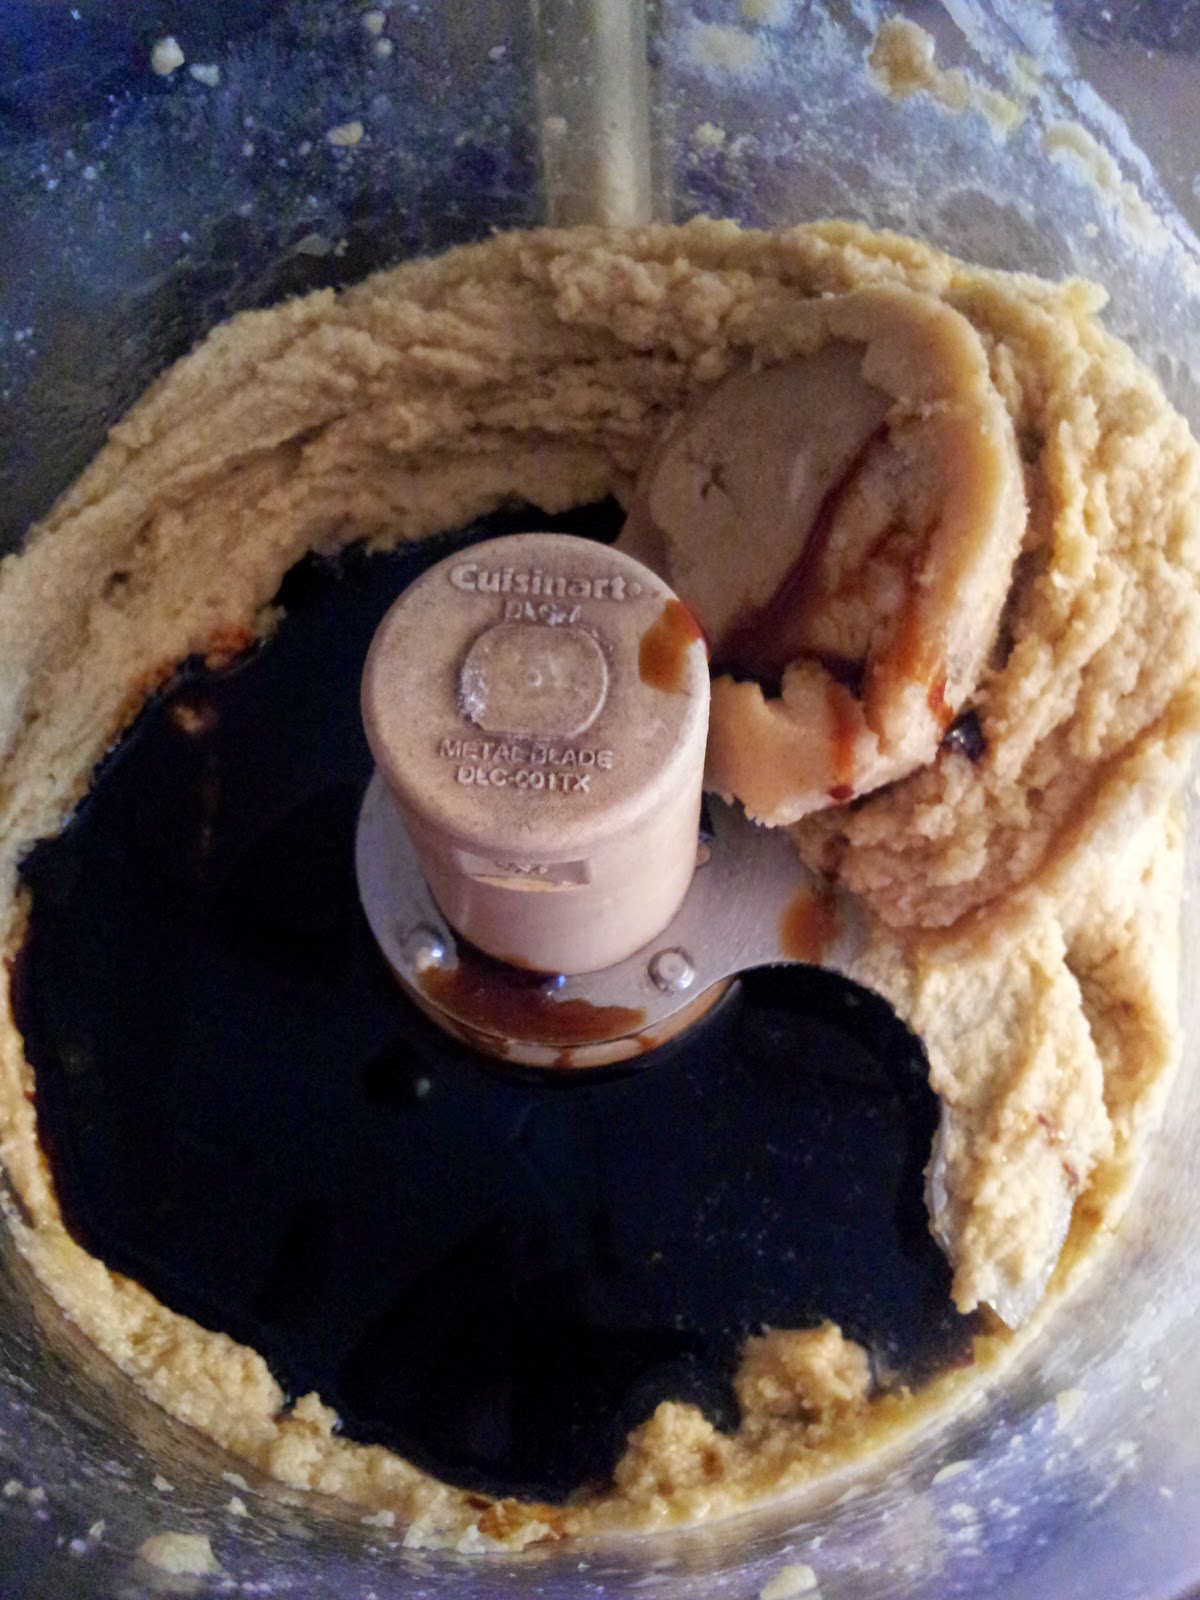
molasses and vanilla

I used the homemade vanilla from my sister
ready for the dry ingredients

I use whole nutmeg freshly shaved with a microplane

The rest of the spices join the nutmeg on the sheet of parchment

flour and spices in the food processor

The finished dough divided to make two smaller pans

parchment folded to fit the pan and brushed with pan coat

The soft dough is pressed into the pans

when baked and cooled the frosting is applied with an off set spatula

use the parchment to lift the bars out and then peel off the parchment


Yep.  They're good.

Dusted with a little more nutmeg, this pan went into town for Dad's Day.

soft gingerbread cookie bars

1/2 cup butter
1/2 cup granulated sugar
1/2 cup brown sugar
1 egg
3/4 tsp vanilla
1/4 cup molasses
1/2 tsp cinnamon
1/8 tsp cloves
1/8 tsp nutmeg
1/2 tsp ginger
1/2 tsp salt
2 cups all purpose flour 
1 tsp baking soda

cream cheese frosting 

4 ounces cream cheese, softened
1/4 cup butter, softened
1 cup confectioners sugar
1/2 tsp vanilla

Preheat oven to 325°.  Prepare two 8 inch square pans or one small jelly roll pan (9x12x1) by lining them with parchment paper that ha been greased or sprayed.  I left parchment sticking up on two sides to use for handles to lift out the baked bars.

Cream together the butter and sugars.  Add add and mix.  Add vanilla and molasses and mix well.  Combine spices and dry ingredients and combine until thoroughly incorporated.  Divide the dough into two parts and press one part into each of the pans if using two pans or press all of the dough into the single pan if using one.  Bake 20-22 minutes or until edges just start to brown.  Cool completely.  While bars are cooling combine the frosting ingredients and whip until smooth.  Spread frosting over bars and cut into squares.

recipe adapted slightly from here

Tuesday, March 25, 2014

homemade one hour white bread

I recently found a bread recipe that I was anxious to try.  It is a fairly quickly made bread with few steps and few ingredients.  It turned out great.  It is a white bread, baked as a round loaf on a baking sheet instead of in a pan.  I have tried it a couple of times now and the bread was consistently good each time.  I did decide to make three slightly smaller loaves instead of two.  The bread has a great crust, is slightly chewy with a soft texture.  It makes great toast, either in the toaster or toasted on a sheet in the oven and it freezes well.

The process couldn't be easier.  I used my stand mixer with the dough hook to mix and knead the dough.  I used quick rise yeast that is added to the dry ingredients and then the warm liquid is added so no proofing is necessary.  Once mixed and kneaded the bread is shaped into loaves and allowed to raise for 25 minutes.  There is no second raising.  The loaves are slashed across the top and baked for 25 minutes.  The whole process takes about an hour.


Homemade one hour white bread


5 1/4 cup bread flour
4 tbsp sugar
1 1/2 tsp salt
1 1/2 tbsp quick rise (instant) yeast
1 1/2 tbsp oil
2 cups warm water (100-115°)

Place the flour, sugar, salt, and yeast  in the bowl of the mixer.  Combine the water and oil and add to the dry ingredients.  Using the dough hook mix for five minutes.  Remove the dough and knead it a few turns to make a smooth ball.  Divide the dough into two or more pieces and shape each into a round or oblong loaf.  Place on a greased or parchment lined baking sheet and cover with a dish towel.  Let raise 25 minutes.  Preheat oven to 350°.  Bake breads for 25 minutes.  When making three loaves I put two on one sheet and the remaining one on a separate sheet and I bake one sheet first and then the second.  There was no noticeable difference between the bread that baked first and the bread that had an additional 25 minutes to raise while waiting for the first sheet to finish baking.

Source: adapted from here

Shared here:

Tuesday, February 18, 2014

lemon poppy seed scone challenge

Today in an email conversation with Caitlin she asked if I had ever made lemon poppy seed scones as she had just had one and it was pretty good.  I have made scones but never lemon poppy seed ones.  I like scones and I am always on the lookout for a new scone recipe.  I did a quick Google search and found several recipes and they were all fairly similar--flour, sugar, butter, lemon zest, baking powder, soda and salt.  Some had an egg, some had lemon juice, they all had a dairy product for moisture but one was sour cream and one was yogurt and one was milk and two were heavy cream.  Some baked in a hotter oven for a shorter period of time, others a little longer at 25 degrees less temperature.  It was kind of hard to select one to try so I decided to try all five recipes.  What was interesting is that in one of the recipes the baker mentioned that she freezes her raw, shaped scones on a cookie sheet and once frozen she transfers them to a freezer bag and pulls them out as needed and bakes them fresh. I love that idea. 

So hear is my plan.  The next day or so I will hit up the grocery store for lemons and poppy seeds and I will make five batches of lemon poppy seed scones.  And I will bake one or two from each batch and freeze the remainder.  When Caitlin is back at the farm we will bake up some from the freezer of each kind and have a contest to see which most resembles her one that she sampled today and which one we like best.  I will share the recipe for the winner and the links to the rest.  And if none of these turn out to be "it" there is always a search on Pinterest...

Friday, January 17, 2014

breadsticks...or help! my bread didn't raise

Some in my family are Olive Garden fans.  Caitlin and I in particular like their Zuppa Toscana.  Their nearest restaurant is 90 minutes away so we don't often get there but when we do we usually have the soup, salad and breadsticks.

Olive Gardens has published some of their recipes on the web and we make Zuppa at home now.  I have been eating more soup lately and have been thinking a breadstick would be the perfect accompaniment.  Olive Garden makes a great breadstick.  A check of their website did not have a breadstick recipe but there are lots of copycat recipes out there.

I decided to try the Todd Wilbur recipe.  Todd Wilbur has written cookbooks and been on television with his copycat versions of restaurant favorites.  I am kind of a novice bread baker but recent attempts at whole wheat bread and pumpkin dinner rolls were successful so I was game to give it a try.

I have tried this recipe twice now.  With my first attempt I had already added the yeast to the water when I realized that I did not have enough bread flour.  All of the other recipes used all purpose flour but Todd felt that the bread flour was essential for this recipe.  I decided to go ahead, using the small amt of bread flour that I had and supplementing with all purpose.  The bread  dough was kind of stiff and didn't raise very well but I shaped it and baked it and vowed to try again after picking up some bread flour at the grocery store.  The breadsticks, once baked tasted okay, they were kind of dense but they had good flavor.

So attempt number two at  the Todd Wilbur copycat breadsticks was yesterday.  I followed the recipe using the requisite bread flour and set my dough to raise.  Nothing happened.  It did not raise.  90 minutes later I had the same lump of dough sitting in the bowl.

Google is my friend so I googled 'my bread didn't raise' and there were tons of hits.  Apparently I am not alone in the bread not raising department.  I picked several of the top sites and read thru the comments from people trying to help others with their bread issues and I learned a lot.

By far the most common suggestion was that it could have been dud yeast.  I checked for expiration date on my jar of yeast and mine was good.  And besides it worked not too long ago and I keep it in the refrigerator.

Another frequent comment was about the temperature of the liquid and the need to proof the yeast.  I have to admit that guessed on the temperature but I did proof the yeast and mine did get foamy.

There were some suggestions about how to rescue my dough so that I could still use it.  The method I chose was to make another batch of dough and cut up the 'bad' dough and incorporate it into the 'new' dough.  But first I did a bunch more reading.  Here are some things that I read.

  • One commenter suggested that too much flour would make the dough stiff and it wouldn't raise as well.  hmm...my dough was stiff.
  • One commenter suggested too much water when proofing the yeast could affect the raising.  hmm...my recipe called for more water than was suggested.
  • One commenter suggested that she was a professional baker who still sometimes had trouble with raising dough and more often it was the recipes that used water instead of milk that failed to raise for her.   Did I want to try milk?
  • There was an ongoing discussion about percent hydration and complicated formulas for how much liquid to flour ratios that was a little over my head but was interesting to read.
  • One commenter suggested that maybe the house was too cool to encourage bread raising.  Probably not my only problem but I was trying to bake bread in an old farmhouse during a blizzard.
  • One commenter recommended that she mixed her ingredients to wet her flour and then let is sit covered for a bit before she needed it to let the gluten start to form.  I could try that.
  • And then the conversation in the comments turned to substituting one yeast for another.  I took another look at my yeast (rapid rise) and the recipe (active dry).  Hmmm.  I thought rapid rise yeast was just a faster form of active dry but it turns out that it is used in different ways.  You add it with the dry ingredients instead of proofing it and adding it with the liquid.
  • There was also some discussion about the fat used but that discussion was from people from New Zealand(?) and they have different names for their fats apparently.  I decided not to worry about the half a stick of butter in my recipe just yet.
So here is what  I decided to do.  I would make another batch and when incorporating the last ingredients I would add the cut up chunks of 'bad' dough.  I would add the yeast with the dry ingredients and withhold part of the flour (I thought I would start with 1/2 cup less) and add it in if it seemed that the dough was just too sticky to work with.  I would check the temperature of the water.  I would let the dough rest for 20 minutes once the 'bad' chunks were incorporated and then knead.  And I would try to warm up the kitchen during the raising.

And it worked.  The breadsticks came out better than the first batch.  The dough raised both the first raising and the second raising once they were shaped.  The finished product was lighter and had a good flavor.  Were they perfect?  No.  Will I at anytime soon be competition for Olive Garden?  Not hardly.  I have a double batch of breadsticks that will last me a  while.  But I will try them again.  My shaping needs some work.  My breadsticks  are short and fat and more resemble a hotdog bun than a breadstick.  So I have some things to work on.  But I have a few in a cute storage jar in the pantry and a bunch more in the freezer.   I might by active dry yeast and give Todd's recipe another try but for how I will use up my rapid rise in this adapted recipe.


Copycat Olive Garden Breadsticks

2 Tbsp sugar
3/4 tsp rapid rise yeast
2 1/2-3 cups bread flour
1 1/2 tsp salt
1/4 cup (1/2 stick) softened butter
1 cup plus 1 Tbsp warm water

2 Tbsp melted butter 
1/2 tsp garlic salt

Combine the flour and the butter in a stand mixer with the paddle attachment and mix to incorporate the butter.  Add the yeast, sugar, and salt  and mix briefly to combine.  Add the warm  water and mix  until all of the dry ingredients are moist.  Remove the paddle attachment, cover the bowl and let it rest 20 minutes.  Attach  dough hook and knead for 10 minutes.  Let raise covered 60-90 minutes or until double in size.  Shape the dough by portioning into 12 or 13 two ounce pieces and roll between your hands or on the countertop to make a 7 inch long breadstick.  Place on a  parchment lined baking sheet and  cover and let raise another 60-90 minutes.  Bake 400° for 12 minutes.  When you take them out of the oven brush immediately with melted butter and sprinkle with garlic salt.


Recipes:

Todd Wilbur's recipe
Google search sites here, here, here, here and here.

Linking up with


Sunday, December 29, 2013

jack's cheesecake

My brother Jack loves cheesecake and I used to make cheesecake.  Until my kids started settling in the big city Jack's house was where I stayed when I needed to be in the city overnight.  One year when I was staying with him I brought him a portable mixer, a mixing bowl and a springform pan and my recipe for cheesecake.  I taught him how to make cheesecake and now when we get together for Christmas he brings cheesecake.  He makes a great cheesecake.  He is better at it than I am.  I still make cheesecake once in a while but it has become Jack's cheesecake now.


Jack's cheesecake is a New York style cheesecake with 32 ounces of cream cheese in it.  He prefers it unadorned but it is pretty good with a little caramel and chocolate syrup and a few nuts to make a turtle cheesecake or some fruit topping if that is what you prefer.

Jack's cheesecake

I cup graham cracker crumbs
3 Tbsp sugar
3 Tbsp butter melted
4 8 oz packages cream cheese, softened
1 cup sugar
3 Tbsp flour
4 eggs
1 cup sour cream
1 Tbsp vanilla

Crust:  Combine cracker crumbs, 3 Tbsp sugar and melted butter.  Press into bottom of springform pan.  Bake at 325° for 10 minutes.  Cool. 

Filling: Combine cream cheese, 1 cup sugar and and flour mixing on medium speed with electric mixer until well blended.  Add eggs one at a time, mixing well after each addition.  Blend in the sour cream and the vanilla.  Pour over crust.  Bake at 450° for 10 minutes.  Reduce oven temperature to 250° and continue baking for 1 hour more.  Loosen cake from the rim of the pan .  Cool before removing the rim of the pan.  Top with can of cherry pie filling if desired.

Joining Foodie Friday

Saturday, December 28, 2013

oscar and alma's popcorn balls

Oscar and Alma were my paternal grandparents, my dad's mom and dad.  They made popcorn balls each Christmas along with a bunch of other--mostly Norwegian--goodies.  My grandmother would load up her popcorn balls into a large red shortening tin each year.  I have one of her tins.


This is her recipe for popcorn balls.  

Oscar and Alma's popcorn balls

5 quarts popped corn
3/4 cup corn syrup
2 Tbsp water
1/4 cup butter
2 1/4 cup confectioners sugar
1 cup marshmallows

Use a large bowl for the popped corn.  In heavy pan combine all but the popped corn and boil over low heat.  Immediately pour over popped corn and mix to coat all popped corn.  Wet hands with cold water and form into balls.  Should make 12 good sized balls or more smaller ones.  Wet hands several times as needed during the forming of the balls. 

chex mix

We make chex mix every Christmas.  Perhaps I am stuck in a rut but I always make the original.  I buy the cereal and the mixed nuts but often forget to get the pretzels and other add ins.  So ours is just cereal and nuts most years.  This year I used a can of mixed nuts and a bag of Spanish peanuts as that is what I had on hand and I usually make a double batch.

Chex mix

6 cups corn chex
6 cups rice chex
6 cups wheat chex
1 container mixed nuts
1 bag Spanish peanuts
12 tbsp butter (1 1/2 sticks)
4 Tbsp Worcestershire sauce
1 Tbsp seasoned salt
1 1/2 tsp garlic powder
1 tsp onion powder

Combine the cereal and nuts in a large bowl.  Melt the butter and add the seasonings.  Pour over the cereal and mix well.  Pour the cereal mixture into a roasting pan and bake at 250° for 1 hour stirring every 15 minutes.  Pour onto paper towels to cool.

cooling  chex mix